
Athelney Pass: The Park that never was
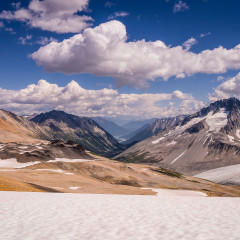
“Why isn’t this place a park?” I uttered those words as myself and Spring had just found a large rock that would be comfortable to sit on as we unpacked our lunches. We where sitting atop “The Elephant”, an unofficially named volcanic plug of rotten rock. A few kilometers away we could just about hear the whoops! of elation as 4 of our friends were reaching the summit of Ochre Mountain. We shouted out to them, not sure if they could hear us, and settled in to spend a few minutes soaking in the views before heading on to our next peak of the day. “Athelney Pass” I said to myself “… what a place!” The previous day myself, Spring and 5 other friends had spent 8 hours with heavy packs on our backs hauling our camping gear 15km’s up Salal Creek. For the most part you can walk on river rocks to follow the course of the creek, at other times you need to deke into the forest to avoid where the creek abuts the shore. It had been a hard approach hike. On paper it looks relatively easy by our standards with only 800m’s of elevation being gained over those 15km’s. We’d previously camped on Panorama Ridge in Garibaldi Provincial Park which was a 15km hike one way but with double that elevation gain and we had found that to be a breeze. This approach hike was a different kind of hard though. It was mentally fatiguing. On most trails we can just turn our brains to autopilot, but for walking on these polished river rocks we had to always be vigilant in our foot placements. Stepping on the wrong rock could mean a rolled ankle or worse. We could never really let our minds rest, we had to always be paying attention about our next foot placements. We eventually reached our campsite, beside a dilapidated mining cabin, and pitched our tents. The valley had lost the sun by the time we finally arrived and the mosquitoes had come out in their droves to feed. Nevertheless, we couldn’t help but feel like we’d arrived somewhere special. We looked out towards the large Ethelweard Glacier across from us, and turned in for the night. The next morning a few different objectives for the day were discussed. Myself and Springs plans didn’t really match up with anyone elses so just the two of us set out together. Everyone had decided to stay on the West side of Athelney Pass. The peaks on the East side of the Pass look considerably more intense and would likely require glacier travel gear....
When Sisyphus met Zeno: Tantalus Digressions
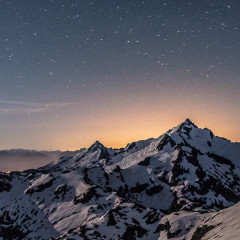
I have a bit of an obsession with the Tantalus Range of Mountains. Most Mountaineers who live near Mountains will let you know that their local peaks that are visible from their work or home can offer more allure than even the high ranges of the Himalayas. For myself, the Tantalus Range has been visible from every place that I’ve lived in the little town of Squamish. It’s peaks are striking, its lakes are pristine and even though it is located close to large population areas you can feel completely isolated when exploring there. What adds to this allure is that it is not easily accessed. A wide and fast river with no legal bridges cuts off most of the central and southern area of the range. If you have the wallet you can fly in via helicopter or float plane or hire a boat to get you across. If you have the stomach you can walk the cables for a locked cable car. I’ve never done the latter myself but heard it is spicy and most people recommend finding another way to cross after they’ve tried it. Alternatively, you can walk in from the North, starting at pretty much sea level. On Canada Day Weekend 2013, myself and Spring planned to walk in from the North and try and access the crown of the Tantalus Range, Mount Tantalus herself. If you’ve driven Highway 99 from Vancouver to Whistler, BC under blue skies your jaw has likely dropped at the sight of Mount Tantalus. An impressive vista opens up and you get to look right into the heart of the Tantalus Range with all it’s most impressive peaks laid out before you. On a clear crisp day the pullout for this viewpoint is usually chock full, from dawn till dusk, with tourists snapping pictures of themselves against the backdrop. After some research about ways to reach this summit I decided to take the road less traveled to try and reach it on foot, accessing the summit via the North Ridge. The consensus online appeared to be to save your energy and fly in to the base of the North Ridge, but I wanted to at least see what the approach would be like. We’d hike in from the North via the Sigurd Creek trail, hike up and over the shoulder of Pelion Mountain (we’d been here before) then follow a ridge that drops a ways down to the South of Pelion and ascend to a col. between Zenith Peak and Mount Tantalus. To reach this col. is no great distance, it’s only about a 15km hike. What puts a...
Skins, Skis and Aching Knees
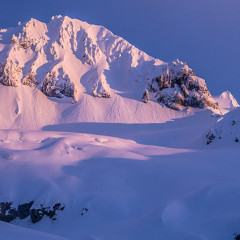
“I’m concentrating on Ice Climbing this Winter, not Skiing” I foolishly uttered those words to myself last Fall believing I would hold fast in my convictions. I truly believe that if you want to get good at something, not just passably capable, you need to pick one pursuit per season. I’ve consistently broken my own rule in this regard. I’m like that dog in the film “UP” that has all the intentions in the world of doing one thing only, until SQUIRREL! I see a SQUIRREL! Coming into Winter last year I wanted to work solely on my Ice Climbing. It was all going well for a while, we took a 5 day ice climbing course in Canmore, Alberta and we tried to go Ice Climbing near Lillooet, BC for a few weekends but the shiny new skis of my friends kept glinting in the corner of my eyes. You see, when I’d chosen to focus on Ice Climbing, my circle of friends had not received the memo. They’d all chosen to focus on learning to backcountry ski. I staved off looking at that Squirrel for a few trips, whilst I wallowed through the powder in my démodé snowshoes. But eventually I couldn’t take it any more. I caved. MEC, our outdoor gear mecca, was clearing out of all their Ski gear for their Spring stock and had slashed their prices. Myself and my other half went in and bought everything we needed; skis, skins, boots and bindings. We already had ski poles and avalanche gear but still, it was a big chunk of change to get going. After the dust settled and we had our newly acquired Alpine Touring Ski setup laid out in our spare bedroom cum walk-in-gear-closet we wondered “now what?” Our friends, who had been touring on their skis all winter, invited us on an overnight trip to attempt a couloir on the East face of Atwell Peak. We wouldn’t be skiing this gully, only skinning up to it and then boot packing our way up to the summit. Nevertheless, just getting to the campsite below the base of Atwell, ~32 kms return with ~2000m’s of elevation gain, would be a big undertaking, seeing as this would be our first time in the backcountry on touring skis. We were apprehensive but I knew that the first half of the route is a common trail for beginner backcountry skiers, leading to the Elfin Lakes Hut. If we felt like we were way out of our depth by the hut we could always temper our plans, stay at the Hut for the night and spend the next day practicing our backcountry...
Our first tent: The MSR Mutha Hubba
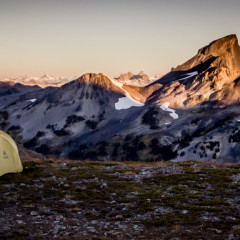
Back in mid 2010 myself and my wife knew we needed to bite the bullet and start buying all our camping and hiking gear. We’d recently moved to BC, Canada from Ireland and knew that we wanted to start exploring the mountains as soon as possible. The problem was we knew nobody and didn’t know anything about how to properly hike or camp in the backcountry. All our shirts were cotton, all our pants were denim, our shoes were bought for how they looked rather than how they functioned. We had never had reason to ever utter the words “Ice Axe”, “Crampon” or “Gaiter”. Walking into the popular Outdoor Recreation store, Mountain Equipment Coop, in Vancouver we were overwhelmed with how much stuff there was to choose from. We wandered around for close to 4 hours just reading labels, trying stuff on, trying to understand why we’d need one feature over another. Eventually we asked for help from an Employee. He was experienced in hiking and backpacking and guided us for over 2 hours around the store picking out everything from boots, to medkits, to finally a tent. He recommended the MSR Mutha Hubba. We took his advice, and with that we owned our very first tent. It came with us on every overnight trip we took for the longest time. As we grew in our understanding of how to be better hikers and campers our level of appreciation for this tent grew also. It’s simple and quick to set up, has a lot of space inside (you could fit 4 people in a pinch head to toe) and loads of storage in the side pockets. The dual vestibules are nice, especially on snow as you can dig one out and use it as your porch and then use the other one as your kitchen. It’s rated as 3-season only but we’ve comfortably used it through all 4-seasons. Eventually, as we got more comfortable with camping we started to move more towards sleeping in snow pits, under a tarp in a bivy sack, or a much lighter, but cramped winter tent. The Mutha Hubba still gets used occasionally, when we are car camping or when we want to sleep 3 people, but it sees a lot less use now. Every time we take it out though and have reason to use it, we look forward to it. So many memories are stored within those nylon walls, so many amazing views woken up to and perilous nights survived. It was and is an awesome tent. Buy (Canada): MSR MUTHA HUBBA HP 3 PERSON TENT Buy (USA): MSR Mutha Hubba Tent ...
MSR Reactor Hanging Kit: Thoughts on stoves in tents
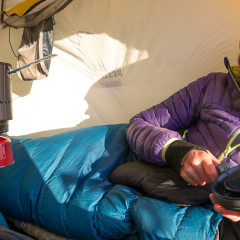
I recently bought the MSR Reactor Hanging Kit for my MSR Reactor Stove System and had an opportunity to test it out. At this point I guess I need to state that MSR recommends that you do not use their Reactor stove or the hanging kit inside the confines of a tent. For legal reasons I understand why they need to do this, it’s the same reason Q-tips needs to warn on their packaging “Do not insert in ear canal” which I’m pretty sure is the actual use of 90% of Q-tips. It is inherently dangerous and hazardous to operate a canister stove inside a tent. Not only could you melt the tent down around you, the stove is also pumping out carbon monoxide which could kill you. You are also making boiling water in an extremely cramped space, which, if knocked over, could severely scald bare skin. In saying all that, if you are smart, and can effectively mitigate those risks there are benefits to hanging a stove inside your tent. For myself I’d be interested in keeping my stove inside my tent when the weather is extremely bad outside, it’s the dead of winter and extremely cold, outside space is limited (camped on a ledge or ridge crest) or all of the above. The benefits of using the stove in this manner, in my opinion, are: Stove runs more efficiently due to less or no wind and by keeping the canister warmer. Less fuel is needed due to the previous benefit. Heat output by the stove is radiating into the tent raising the ambient temperature. Less body heat is being lost by having to operate the stove outside of the tent and outside of your sleeping bag. More appealing to hydrate. We tend to forget the human factor sometimes. I’ve made the bare minimum amount of water before because I wanted to spend more time in my sleeping bag and less time out in the cold. Making water, especially at higher elevations, can be a pain. Usually by the time you have to make water you are already exhausted and just want to lie down and rest. Being able to rest and have your water boiling makes it more appealing to hydrate more. The better hydrated you are the warmer you’ll be, the better you’ll sleep, the more energy you’ll have the next day… etc. If these benefits seem desirable then here is how I recommend mitigating the risks. Light the stove outside of the tent. Canister stoves can flare up when first ignited. You also don’t want to have a few misfires and fill your tent with gas which will combust when...


