
Early Season Ice Climbing
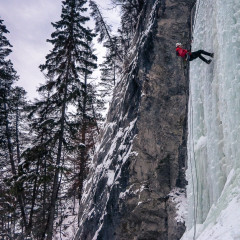
Since our week long trip to Canmore last Winter, Ice Climbing has become a passion of ours. This past season has seen us put a lot more effort into Climbing in general. Climbing is not just a full body sport, it’s a full everything sport. It’s physical, mental and emotional. It’s the perfect activity in my opinion. I can understand why people give up everything to live in a van and climb full time as a dirtbag. Climbing gives you almost everything you need to feel a sense of living fully. Ice Climbing, however, tends to not have a huge following. Even within the climbing community only a small subset of climbers will learn to climb ice and stick with it. For most it appears to be a novelty activity to do once, take some photos of and then never do again. Not for myself. Something about the aesthetics of it appeals to me. Swinging sharpened Ice tools and kicking serrated barbs of steel into walls of frozen water. Seeing layers of ice shatter and explode or feeling the ice tool make a satisfying “thunk” as it bites solidly from a perfect flick of the wrist. All ice is not made equal either. Time, weather and location can have a dramatic effect on the properties of the ice you will be climbing. The type of ice you climb in the morning can be completely different to the type of ice you climb that same evening. To rock jocks that have never been on ice I try to use this analogy, “Imagine going to your favorite granite rock climbing area only to discover when you get there that the rock has now changed to limestone with bands of gneiss running through it, and instead of a 5.10b crack you now have a 5.11a face climb. It’s that kind of flux that you have to be prepared for with ice” Or put simply by a friend of mine as we geared up at the base of a climb: “Ice Climbing is just badass, that’s it, everyone knows it” What follows are some accounts of the Ice Climbing trips I’ve been on in the past few months and what I’ve learned from those experiences. Mount Baker Seracs: Spring wrote about our experience at Mount Baker here: “Mount Baker: Ice Climbing“, so I won’t labor the details. I was really psyched to get out on glacier ice. From all my glacier experience the number one rule has always been to avoid going anywhere near crevasses but on this trip our goal was not only to find the deepest, darkest cracks in the glacier...
Mount Baker: Ice Climbing
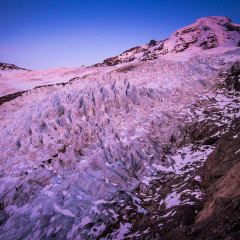
“Did you see the BCMC call out for a trip to the Mt Baker seracs to do some ice climbing? Do you want to sign up?” This was the question I received in a text from Leigh one morning in October. I texted back within seconds saying “Anniversary at Baker!” It just so happened that the Thursday before the trip we would see our 8th year wedding anniversary come and go. This seemed like the perfect way to see in another year of adventure together. We signed up for the trip and started dreaming about climbing ice again. The only type of ice that Leigh and I have climbed before has been waterfall ice, some in the Rockies and some in the Coastal Range, so climbing glacier ice was going to be a new experience for us and it was going to take some time to knock the rust off of our recently acquired ice climbing skills. We set up top-ropes at the first wall of ice we could walk up to on the glacier. These first climbs proved to be more difficult than anticipated, and everyone, albeit 1 or 2, had to shout “take” more than once on their way up. There were several bulges and overhangs to contend with and the density of this ice was proving to be very hard and made for some very ginger tool placements, as no crampon or ice pick was really sinking in. All part of the learning process and also part of the beauty of ice climbing, no two walls of ice are ever the same. Once we had our fill of these climbs we decided to make our way over to an area where 2 from our group set up a few more ropes. We had to weave around gaping crevasses, jump over cracks in the ice and down-climb some sections just to get to the climbing area. It was unnerving but so much fun at the same time. It was really starting to feel like we were on another planet with such an other-worldly almost eery feeling. The only sounds apart from the odd shout of “on belay” or “climb on” was the groaning and cracking of the glacier. I walked the final narrow ice bridge towards the crevasse where the top-ropes were set up to see that you had to rappel into the hole if you wanted to climb. I felt a reluctance at first, as my first instinct is to always avoid being inside a crevasse, but I had to find a way to push through it and I joined Leigh and our friend Scott down below. Did someone say...
Hiking: Tips and Tricks
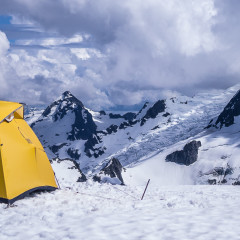
Sometimes, the best tips and tricks are learnt the hard way, so I thought I’d compile a list of some of mine that I’ve picked up over the last few years from hiking and backpacking through all four seasons and from valley floor to mountain top. Tie your shoe laces properly: This is a bit of a life hack as you can utilize it outside of hiking. If you find your boot laces start to loosen every few hours when you’re hiking you probably learned to tie a granny knot instead of a square knot when you first learnt to tie up your shoes. I realized this mistake myself and went searching for a solution. Not only does this method guarantee you tie a square knot, but it’s also a lot quicker. I also find this method of tying up my shoes a lot easier with large winter gloves on than the usual method. Use a Buff: You need to buy a buff if you’re hiking and camping. It has so many uses through all 4 seasons of the year. It can be used as a; Balaclava, Face mask, Neck gaiter, helmet liner, Beanie, Headband, eye mask, wristband. I never leave home without it. Stuff don’t Roll: If you roll up your tent or sleeping bag before putting it in a sack then stop. Stuff it into the sack. I used to roll up everything and I needed to use a 65L pack to go on an overnight trip. When I switched to stuffing everything I was able to get a much lighter 32L pack and still bring the same items. Here’s why, when I’d roll up my sleeping bag I needed a sack that had an opening large enough to fit the entire sleeping bag inside it all at once. These sacks were so large that I couldn’t compress any additional airspace out of them. When I switched to stuffing I only needed a sack with an opening that would fit whatever part of the sleeping bag was bunched up in my hand as I fed it into the sack. I went from using 25L compression sacks to using 8L compression sacks. On most overnight trips, even in the Winter, I can use one 12L compression sack for all my spare clothes, jackets and winter sleeping bag. Here is Spring @ pebbleshoo quickly unstuffing her sleeping bag from her compression sack on one of our recent trips. Start using Compression Sacks: I use a the OR compression sacks, the heavier ones. They’re burly and can take a beating while still being pretty light. They save you weight though by...
Amazeballs
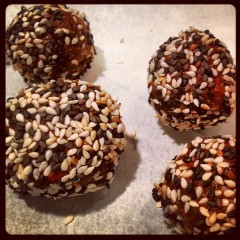
I wanted to share one of my absolute favourite recipes. You have probably seen quite a few versions of “snack or energy balls” around, but as a lover of everything that is almond I love this one. No cooking, no fussing and no prep time required. These are a cinch to make. Just throw the ingredients into a food processor, wiz it up and then roll into balls.Within minutes you will be enjoying a delicious healthy treat. Here is the recipe: Amaze Balls (Raw Cacao Almond Balls) Ingredients: 11 dates 1/2 cup almond butter 1/4 almond flour (optional) 1 cup raw almonds 1/4 raw cacao powder or nibs 1 tbsp raw honey 1 tsp pure vanilla extract 2 tbsp hemp seeds 2 tsp cinnamon 1/4 goji berries (soak for 1-2 minutes in water to soften) 2 tsp chia seeds sesame seeds Directions: Place all the ingredients except for the sesame seeds in a mixer and wiz until smooth. With your hands roll the mixture into small balls. Then pour the sesame onto a plate or in a bowl and roll the balls in until covered. Place the balls on a plate and refrigerate until hard. Tip: If you love the taste of sesame,try toasting the seeds before hand. It really adds an extra layer of flavour! Enjoy! (This recipe has been shared and adapted from one of my lovely friends who was kind enough to make and share more than a few versions of this recipe with me until it became what it is...
Athelney Pass: The Park that never was
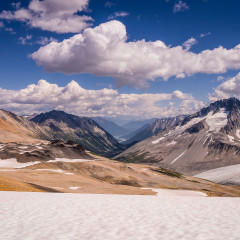
“Why isn’t this place a park?” I uttered those words as myself and Spring had just found a large rock that would be comfortable to sit on as we unpacked our lunches. We where sitting atop “The Elephant”, an unofficially named volcanic plug of rotten rock. A few kilometers away we could just about hear the whoops! of elation as 4 of our friends were reaching the summit of Ochre Mountain. We shouted out to them, not sure if they could hear us, and settled in to spend a few minutes soaking in the views before heading on to our next peak of the day. “Athelney Pass” I said to myself “… what a place!” The previous day myself, Spring and 5 other friends had spent 8 hours with heavy packs on our backs hauling our camping gear 15km’s up Salal Creek. For the most part you can walk on river rocks to follow the course of the creek, at other times you need to deke into the forest to avoid where the creek abuts the shore. It had been a hard approach hike. On paper it looks relatively easy by our standards with only 800m’s of elevation being gained over those 15km’s. We’d previously camped on Panorama Ridge in Garibaldi Provincial Park which was a 15km hike one way but with double that elevation gain and we had found that to be a breeze. This approach hike was a different kind of hard though. It was mentally fatiguing. On most trails we can just turn our brains to autopilot, but for walking on these polished river rocks we had to always be vigilant in our foot placements. Stepping on the wrong rock could mean a rolled ankle or worse. We could never really let our minds rest, we had to always be paying attention about our next foot placements. We eventually reached our campsite, beside a dilapidated mining cabin, and pitched our tents. The valley had lost the sun by the time we finally arrived and the mosquitoes had come out in their droves to feed. Nevertheless, we couldn’t help but feel like we’d arrived somewhere special. We looked out towards the large Ethelweard Glacier across from us, and turned in for the night. The next morning a few different objectives for the day were discussed. Myself and Springs plans didn’t really match up with anyone elses so just the two of us set out together. Everyone had decided to stay on the West side of Athelney Pass. The peaks on the East side of the Pass look considerably more intense and would likely require glacier travel gear....


