
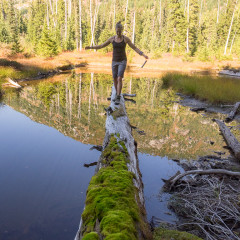
LifeStraw Review
Adventuring in the mountains, running on the trails or travelling to new countries has something in common - the need for clean pure drinking water. Hydration is often something we can take for granted in the western world where we have access to clean drinking water from practically every faucet. However, if you are someone who frequents wild places whether in the mountains, forests or travels to countries where clean water is not readily accessible, the need for clean drinking water becomes a main focus…boiling, filtering or buying bottled water is a must. This often takes considerable time and effort. What if there was a quick and easy way to filter water on the go? We have recently had the opportunity to test out the Vestergaard LifeStraw & LifeStraw Go from Eartheasy. It has changed the way we think about filtering water and significantly increased our ability to hydrate on the go no matter where we are. LifeStraw A convenient straw style filter that is easy to pack and designed for use on the go. Stats: 2 ounces. 9” long x 1” diameter. BPA free, contains no chemicals. Filters out 99.9999% of waterborne bacteria, including E.coli and 99.9% of waterborne protozoa, including Giardia & Cryptosporidium. It also reduces turbidity, filtering down to 0.2 microns, which makes it great for glacial melt water. Filters up to 1000 liters. No aftertaste. Lifestraw does not use iodine. Perfect for an emergency preparedness kit. Due to it’s small compact size we have brought this with us hiking and it is always in our trail running packs. When we know we will be passing by a small stream, tarn or lake we take the opportunity to drink right then and there. It saves us having to stop and re-filter or boil water to fill our water bladders. Being able to pull out the Lifestraw at any given moment to take a few sips of water from a natural water source, safely, without a second thought, is definitely reassuring. Pros: Lightweight Compact Ability to drink from the source Cons: With water sources at ground level it can require a bit of effort to get low enough to use the straw. LifeStraw Go A refillable water bottle with a Lifestraw filter that enables you to take safe drinking water with you wherever you go. Stats: 5.9 oz (168 grams). 9.25” long x 3.14” diameter. BPA free, contains no chemicals. Flip top bite valve and carabiner for attaching to your backpack. 22 ounce volume (0.65 liters). Filters up to 1000 liters. Filters out 99.9999% of waterborne bacteria, including E.coli and 99.9% of waterborne protozoa, including Giardia &...
The Wonderland Valley Resort and Campground
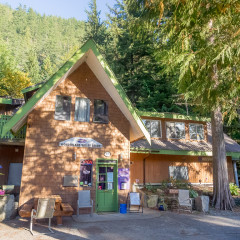
Bottom Line: The Wonderland Valley Resort and Campground is a hidden gem for staying overnight in Squamish. Situated in an amazing location in the trees, with moss covered cliffs beside it, a babbling brook running through it and a secret viewpoint to watch sunsets on the impressive Stawamus Chief and beyond. The amenities are generous with fast Wifi (tested at 50Mb/s download during our stay), laundry facilities onsite for washing and drying and clean washrooms. We found the showers always had hot water and the pressure was always high. Loved it! First Impressions: Hidden in the forest just north of Squamish near Brackendale is the Wonderland Valley Resort and Campground. As you leave Squamish heading towards Whistler it is on the right at the intersection of Highway 99 with Depot Road East. This intersection is known locally as “The Yellow House Intersection” due to the large yellow house on the right as you drive north. Turn right here and head along the road into the forest, following the wonderfully designed purple and gold signs for Wonderland. As we entered the grounds for the first time we realized that this was not an RV park like any other we’d seen before. It was colourful, vibrant and charming. We checked in and went about getting our trailer, an old Boler camper, hooked up to power and water. We picked a spot beside a flowing creek for those soothing babbling sounds that would lull us to sleep every night. The trees above rustled with the wind casting speckled sunshine across the forest floor. This place was indeed Wonderland. The Wonderland name originates from this Resorts location next to Alice Lake, referring to the story of “Alice in Wonderland”. Alice Lake can be reached from the grounds on foot or mountain bike by using the “Wonderland” trail. A lot of the trails nearby have been given “Alice in Wonderland” themed names also. Even though we were only a few minutes drive from Squamish we felt like we were out in the wild. Wonderland Valley Resort and Campground has done an excellent job of preserving the natural experience to their grounds. In the evenings be sure to check out the Water Tower Viewpoint that offers amazing views of the sun setting over the Stawamus Chief mountain and the town of Squamish. It will take your breathe away. More than just a Campground: Not only can you camp out in a tent here, they also have service for both 15 amp and 30 amp Campers and RV’s with water, electrical and sewer hook ups as well as a Hotel with views out above the trees into...
10 Reasons To Run Squamish 50 Every Year
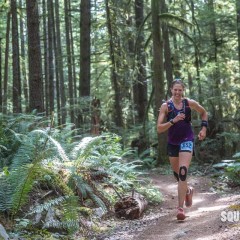
This year made my 3rd year in a row running a distance in the Squamish 50 series. My love affair with the Squamish 50 began when I signed up for my first trail race, the 50km option, in 2013. The following year would see me attempting and finishing my first 50 miler and this year I chose the 50km option once again. What exactly is it about this race that keeps me coming back for more? Here are 10 of my favourite things about this race and reasons why you should put this race on your yearly schedule. 1.Finish line hugs. The race director, Gary Robbins, actually waits at the finish line both days to congratulate every single runner that comes across the finish line with a hug (he might even let you tousle that glorious beard, if that’s your kind of thing). Don’t be surprised either if random runners are coming up to you to hug you, high five and give you a job well done. There is just a lot of love going around at the finish line of this race! 2. Singletrack trail for miles upon miles. The course has been designed to contain at least 85% beautiful forest singletrack.This is trail running at it’s best! 3. Running in a rainforest. That’s right, this isn’t just any forest we are running through. This is Pacific Northwest Rain Forest which means there are giant cedar and hemlock trees, ferns filling the forest floor and moss a colour of green you wouldn’t believe. It’s vibrant, it’s humid and the air is filled with the scent of wet earth and vegetation. 4. Bouncing across wooden mountain bike bridges. Did you know that almost all of the trails in Squamish have generously been created by the SORCA (Squamish Off Road Cycling Association) mountain biking community and do you know what mountain bikers love? Wooden bridges! Funny because trail runners love them too. The short ones curve steeply requiring you to pay extra attention to your footing and the longer ones bounce with each step which means the bridge rises up to meet your foot at each placement. 5. Salty potatoes. This might not sound like a big deal or even that tasty. But run 23 km (14 miles), 50 km (31 miles) or 80 km (50 miles) on a warm August day and tell me that the starchy, salty, melt in your mouth potato doesn’t hit the right spot. 6. High fives everywhere. I like to think that trail runners are a different breed of runner. They are friendlier, more excitable and more willing to have a chat on the trail....
Prepare for the Salomon Valley to Peak Race in Whistler
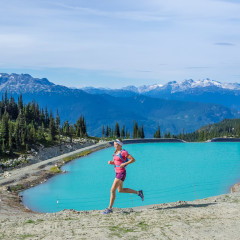
On September 5th, 2015, British Columbia, Canada is going be introduced to a trail race that’s a completely different kind of animal. It’s famously said “the Summit is only the half-way point“, but what if it didn’t have to be? What if the summit was the end? Salomon has created this in Whistler with the Salomon Valley to Peak trail running race, a 23km/14.3M long run that gains over 1609m’s/5280ft from the Valley floor to the very top of Whistler Peak. To put that elevation another way, it’s almost exactly like climbing a vertical mile into the sky. This is going to be intense and epic! Here’s some of my tips on how to prepare yourself for a feat like this. The Secret to Running up Mountains What’s the secret to training for an uphill race like Salomon Valley to Peak? The secret is that there is no secret at all. You just need to put in the miles, get breathless and learn to love feeling a little uncomfortable. There are a few top tips though that can definitely help you to get the most out of race day and really have fun out there. Run Hills Let’s be honest, running uphill is hard work, but it is what makes you a stronger runner. Think of running uphill in terms of perceived effort rather than pace. What this means is that you won’t be trying to run up the hill at the same pace that you can run on flat trail, instead slow your pace down to a point that allows you continue running at a regulated heart rate. If you push uphill too fast your heart rate will spike, that’s just something you won’t be able to maintain for long. Learn to power hike/walk Yes you read that right, walking is definitely allowed! This isn’t your everyday walking pace though. This is a hiking pace with a bit of oomph behind it. It’s all about power and stride. If the hill is too steep or sustained for you to continue running, oftentimes it is more efficient to power up those hills in hiking mode. When you are out training on your long hills, throw some power hiking into your routine with emphasis on the power. Pump your arms, straighten your back and take short steps to ensure you are using the big glute muscles to propel you up the hill. Run Technical Trail Trail running often involves technical terrain, roots, rocks and twisty trail, and the Salomon Valley to Peak race is no different. Be prepared for this type of trail by training on it. Practice running up and...
Exploring the Whistler Via Ferrata
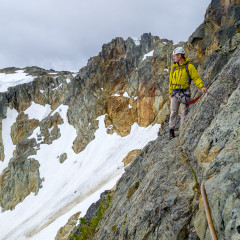
If you haven’t already, check out our previous post about Via Ferratas and our experience on the Squamish Via Ferrata at the Sea to Sky Gondola. You can read that here: An Adventure on the Squamish Via Ferrata Well, after our morning out with the Mountain Skills Academy on the Squamish Via Ferrata we were psyched to check out the Whistler Via Ferrata next. The Whistler Via Ferrata was one of the first of it’s kind in Canada and we were told that it was a few grades harder than the newer one recently opened in Squamish. Fresh off our experience in Squamish we were excited to see for ourselves what it was like! It’s longer than the Squamish Via Ferrata being a 4 hour return trip from the Roundhouse on Whistler Mountain. Myself and Spring met up with our Guide and group at the base of the gondola in Whistler. From there we took the gondola up and got to know each other on the scenic ride up the mountain. At the top we went to a little cabin near the Roundhouse to get our harnesses, helmets and lanyards. Coming straight off our Squamish trip we felt like seasoned pros with the equipment. Weather couldn’t slow us down. We headed out promptly and got the day underway. Clouds were building overhead and weather looked to be rolling in but it didn’t slow us down. Right away we got that big mountain feel. From the Roundhouse you will be starting above the trees in the Alpine. We were surrounded by rock, ice and snow. After hiking for a bit towards Whistler Mountain we gained the base of our route and the fun of climbing the “Iron Road” began. We clipped into the security of the metal cable running along the length of the route and started moving upwards steadily. We could definitely feel that this Via Ferrata was different to the Squamish one. The rungs were further apart and in places you needed to hold onto rock to move upwards. It was varied and interesting but never too hard. A girl in our group had never done anything remotely like this before and she found it a lot of fun. We always had the reassurance that we were protected as we were clipped into the metal cable. Bringing back the High 5 on Whistler Mountain! The route had an awesome mountaineering feel. We traversed ledges, moved around blocky features, ascended steep cliffs, all while working our way towards the summit. If you want that feeling like you are aiming for an objective in the mountains and working to achieve it...
An Adventure on the Squamish Via Ferrata
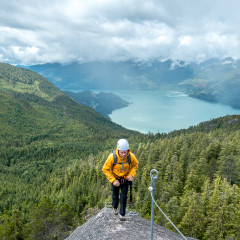
“What is a Via Ferrata?”, it’s understandable if you’re asking that question right now. Being honest, up until a few years ago I didn’t exactly know what it was myself. I’m going to explain what it is below but let me first say this, if you’re a hiker and living in or thinking about visiting the Southwest of British Columbia you should get stoked right about now because having access to a Via Ferrata in Squamish is going to be a game changer for many of you. “Via Ferrata” is an Italian word that translates to “Iron Road”. They’ve been used for centuries but were popularized during WWI as a means of safely moving troops and equipment through the Alps. They are now found extensively throughout Italy and Austria as attractions for people to be able to move in the mountains and on cliffs with the security of protection bolted into the rock. It’s common for individuals in that region to have experience on Via Ferratas. Growing up hikers there progress from being on steep trails, to using Via Ferratas in the Mountains, to learning to climb rock and use ropes. It’s a part of the process of learning to move in the mountains. Squamish needed a Via Ferrata. It’s awesome now that Squamish, a world renowned Mountain and Climbing town has got its own Via Ferrata for people to experience. If you’ve hiked on trails and want to experience something a little bit more adventurous, then this Via Ferrata is definitely for you. When I first moved to Squamish I hadn’t really ever been in the mountains before. I learned to hike and backpack but I found it hard to make the next step to learning to climb. It felt like a leap to go from hiking on trails to suddenly climbing rock faces. I hadn’t developed a trust in the ropes that I would hang my life on. Eventually I pushed through and started climbing but I couldn’t help but feel like there was a step between hiking and climbing that I was missing. That step is Via Ferratas. Myself and Spring had the opportunity to get guided by the Mountain Skills Academy on the Squamish Via Ferrata at the Sea to Sky Gondola. This would be both of our first times on one of these “Iron Roads” along cliff faces. We met up with our guide near the Summit Lodge of the Sea to Sky Gondola and received a tutorial about the gear we would be using. The Mountain Skills Academy provided the harness and helmet for us as well as the Y-shaped lanyard that we’d...


