
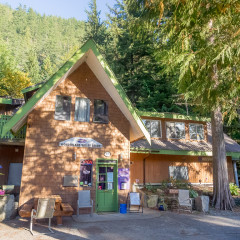
The Wonderland Valley Resort and Campground
Bottom Line: The Wonderland Valley Resort and Campground is a hidden gem for staying overnight in Squamish. Situated in an amazing location in the trees, with moss covered cliffs beside it, a babbling brook running through it and a secret viewpoint to watch sunsets on the impressive Stawamus Chief and beyond. The amenities are generous with fast Wifi (tested at 50Mb/s download during our stay), laundry facilities onsite for washing and drying and clean washrooms. We found the showers always had hot water and the pressure was always high. Loved it! First Impressions: Hidden in the forest just north of Squamish near Brackendale is the Wonderland Valley Resort and Campground. As you leave Squamish heading towards Whistler it is on the right at the intersection of Highway 99 with Depot Road East. This intersection is known locally as “The Yellow House Intersection” due to the large yellow house on the right as you drive north. Turn right here and head along the road into the forest, following the wonderfully designed purple and gold signs for Wonderland. As we entered the grounds for the first time we realized that this was not an RV park like any other we’d seen before. It was colourful, vibrant and charming. We checked in and went about getting our trailer, an old Boler camper, hooked up to power and water. We picked a spot beside a flowing creek for those soothing babbling sounds that would lull us to sleep every night. The trees above rustled with the wind casting speckled sunshine across the forest floor. This place was indeed Wonderland. The Wonderland name originates from this Resorts location next to Alice Lake, referring to the story of “Alice in Wonderland”. Alice Lake can be reached from the grounds on foot or mountain bike by using the “Wonderland” trail. A lot of the trails nearby have been given “Alice in Wonderland” themed names also. Even though we were only a few minutes drive from Squamish we felt like we were out in the wild. Wonderland Valley Resort and Campground has done an excellent job of preserving the natural experience to their grounds. In the evenings be sure to check out the Water Tower Viewpoint that offers amazing views of the sun setting over the Stawamus Chief mountain and the town of Squamish. It will take your breathe away. More than just a Campground: Not only can you camp out in a tent here, they also have service for both 15 amp and 30 amp Campers and RV’s with water, electrical and sewer hook ups as well as a Hotel with views out above the trees into...
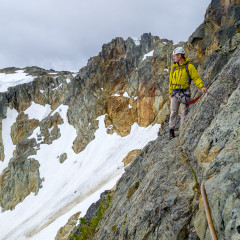
Exploring the Whistler Via Ferrata
If you haven’t already, check out our previous post about Via Ferratas and our experience on the Squamish Via Ferrata at the Sea to Sky Gondola. You can read that here: An Adventure on the Squamish Via Ferrata Well, after our morning out with the Mountain Skills Academy on the Squamish Via Ferrata we were psyched to check out the Whistler Via Ferrata next. The Whistler Via Ferrata was one of the first of it’s kind in Canada and we were told that it was a few grades harder than the newer one recently opened in Squamish. Fresh off our experience in Squamish we were excited to see for ourselves what it was like! It’s longer than the Squamish Via Ferrata being a 4 hour return trip from the Roundhouse on Whistler Mountain. Myself and Spring met up with our Guide and group at the base of the gondola in Whistler. From there we took the gondola up and got to know each other on the scenic ride up the mountain. At the top we went to a little cabin near the Roundhouse to get our harnesses, helmets and lanyards. Coming straight off our Squamish trip we felt like seasoned pros with the equipment. Weather couldn’t slow us down. We headed out promptly and got the day underway. Clouds were building overhead and weather looked to be rolling in but it didn’t slow us down. Right away we got that big mountain feel. From the Roundhouse you will be starting above the trees in the Alpine. We were surrounded by rock, ice and snow. After hiking for a bit towards Whistler Mountain we gained the base of our route and the fun of climbing the “Iron Road” began. We clipped into the security of the metal cable running along the length of the route and started moving upwards steadily. We could definitely feel that this Via Ferrata was different to the Squamish one. The rungs were further apart and in places you needed to hold onto rock to move upwards. It was varied and interesting but never too hard. A girl in our group had never done anything remotely like this before and she found it a lot of fun. We always had the reassurance that we were protected as we were clipped into the metal cable. Bringing back the High 5 on Whistler Mountain! The route had an awesome mountaineering feel. We traversed ledges, moved around blocky features, ascended steep cliffs, all while working our way towards the summit. If you want that feeling like you are aiming for an objective in the mountains and working to achieve it...
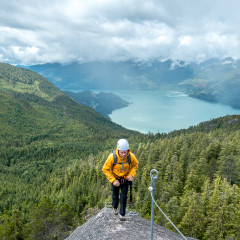
An Adventure on the Squamish Via Ferrata
“What is a Via Ferrata?”, it’s understandable if you’re asking that question right now. Being honest, up until a few years ago I didn’t exactly know what it was myself. I’m going to explain what it is below but let me first say this, if you’re a hiker and living in or thinking about visiting the Southwest of British Columbia you should get stoked right about now because having access to a Via Ferrata in Squamish is going to be a game changer for many of you. “Via Ferrata” is an Italian word that translates to “Iron Road”. They’ve been used for centuries but were popularized during WWI as a means of safely moving troops and equipment through the Alps. They are now found extensively throughout Italy and Austria as attractions for people to be able to move in the mountains and on cliffs with the security of protection bolted into the rock. It’s common for individuals in that region to have experience on Via Ferratas. Growing up hikers there progress from being on steep trails, to using Via Ferratas in the Mountains, to learning to climb rock and use ropes. It’s a part of the process of learning to move in the mountains. Squamish needed a Via Ferrata. It’s awesome now that Squamish, a world renowned Mountain and Climbing town has got its own Via Ferrata for people to experience. If you’ve hiked on trails and want to experience something a little bit more adventurous, then this Via Ferrata is definitely for you. When I first moved to Squamish I hadn’t really ever been in the mountains before. I learned to hike and backpack but I found it hard to make the next step to learning to climb. It felt like a leap to go from hiking on trails to suddenly climbing rock faces. I hadn’t developed a trust in the ropes that I would hang my life on. Eventually I pushed through and started climbing but I couldn’t help but feel like there was a step between hiking and climbing that I was missing. That step is Via Ferratas. Myself and Spring had the opportunity to get guided by the Mountain Skills Academy on the Squamish Via Ferrata at the Sea to Sky Gondola. This would be both of our first times on one of these “Iron Roads” along cliff faces. We met up with our guide near the Summit Lodge of the Sea to Sky Gondola and received a tutorial about the gear we would be using. The Mountain Skills Academy provided the harness and helmet for us as well as the Y-shaped lanyard that we’d...
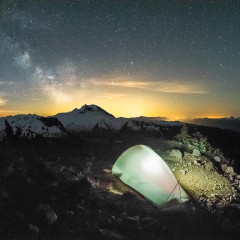
Mountain Hardwear SuperMegaUL 2 Tent Review
Bottom Line: An Ultralight, 2 person, 3 season tent that’s perfect for those fast and light missions when saving a bit of extra weight is going to make all the difference. First Impressions and Observations: The SuperMegaUL 2 is a beautiful tent, sexy even! It’s light (minimum weight: 2lb 2oz), sets up easily and accommodates two individuals on mummy sleeping pads with room in the vestibule for packs and boots. To make this tent as light as it is the designers at Mountain Hardwear have clearly gone over every feature in this tent and shaved grams wherever possibly. It’s this precise attention to detail that gives this tent its beauty. The space inside is at a minimum, but this was expected with an ultralight tent. I’ve slept in it with another person and had no issues. I’m used to sleeping in small Winter tents so I am accustomed to tents with an interior space of this size. Some might say it’s cramped, I’d say it’s cozy. If you want more space then be prepared for your back and shoulders to have to haul more weight uphill. Those are the tradeoffs. Some of the features that I appreciated are: The toggles on the fly attachment points: They make connecting the fly to the tent body extremely easy and the design is so simple, light and functional that I don’t know why every tent doesn’t use this method. The pole design: This tent utilizes a pole design that I hadn’t seen before. It allows the tent to be freestanding while also simplifying setup and reducing pitching time. It has two main poles that are permanently joined together via a soft rubber joint that is positioned at the apex of the tent. Reflective points on the tent: The tent utilizes quite a few reflective points so that you can spot it easily with your headlamp and also avoid tripping over the guy lines around the tent. Pros: Weight: If you aren’t familiar with Ultralight tents then picking this one up will shock you. At 2 lb. 2 oz. (0.98 kg) this is the lightest tent I’ve ever owned. My back is going to thank me! Design: It’s incredibly well designed. You can tell that every inch of this tent has been discussed and altered to have only the essential features included. I also find the aerodynamic profile of this tent appealing to the eye. Vestibule: Not only does the vestibule aid in ventilation it adds extra space outside for storing my pack and boots. Cons: Durability: The materials used in this tent are ultralight which means they need to be managed more than heavier,...
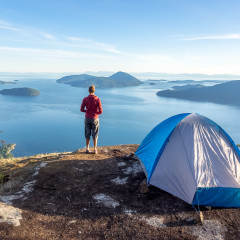
Mountain Hardwear Shifter 3 Tent Review
Bottom Line: A medium weight 3-season, 3-person tent for the budget conscious backpacker that needs a tent that is as good for car-camping at the lake, camping out during a music festival or used as a multi-day backpacking tent. All the bells and whistles are included as standard, including the footprint to protect the base of the tent and a mesh gear loft inside the tent. First Impressions and Observations: This tent weighs in at 6lb 9oz (2.96kg) but that weight is likely going to be lower depending on your needs. It comes with some extra pegs, a mesh gear loft and a tent footprint which, if you wanted to go light, could be left at home without reducing the functionality of the tent. Without these the tent would be <5lb 9oz, which, when you consider splitting the weight between 3 people would come in just under 2lbs each. Not bad for a reasonably priced tent that doesn’t scrimp on space or features! When I first pitched it I could tell that Mountain Hardwear did a lot of work to utilize the vestibule space. This tent has 2 vestibules and depending on how you “shift” (see, this is were the name Shifter comes from) the fly over the main tent body you can have either a wide open vestibule with a mesh door or a more private vestibule and a solid canopy door. I feel this incorporation of a 50/50 mix of mesh and solid canopy will also allow this tent to be used in early Spring and late Fall when the temperatures are lower. I’d definitely have no issue using it in sub-zero temperatures but then I’m crazy like that. The only concern I’d have is if this tent would hold up in strong winds as it only utilizes two crossed poles. There are extra guy line points so if strong winds were expected they could be used to add increased stability. One of my only gripes with this tent is the added shoulder vestibule. This allows for greatly increased storage space in one of the vestibules but, the shouldered area of the vestibule has two small poles inserted into it that can’t be removed, they are sewn into the fly. I’m not a tent roller, I like to stuff my tent into a stuff sack and compress it. I’ve done this with all my tents and I find it is a quicker, more space efficient way of carrying my tent. With these poles inserted into the fly I can’t compress the fly in a stuff sack. I worked around this by just stuffing everything but the section...


